The best kittens, technology, and video games blog in the world.

Showing posts with label hardware. Show all posts

Tuesday, September 27, 2016

Some ideas for building a computer from scratch

Jasper's computer by evhoffman from flickr (CC-SA)
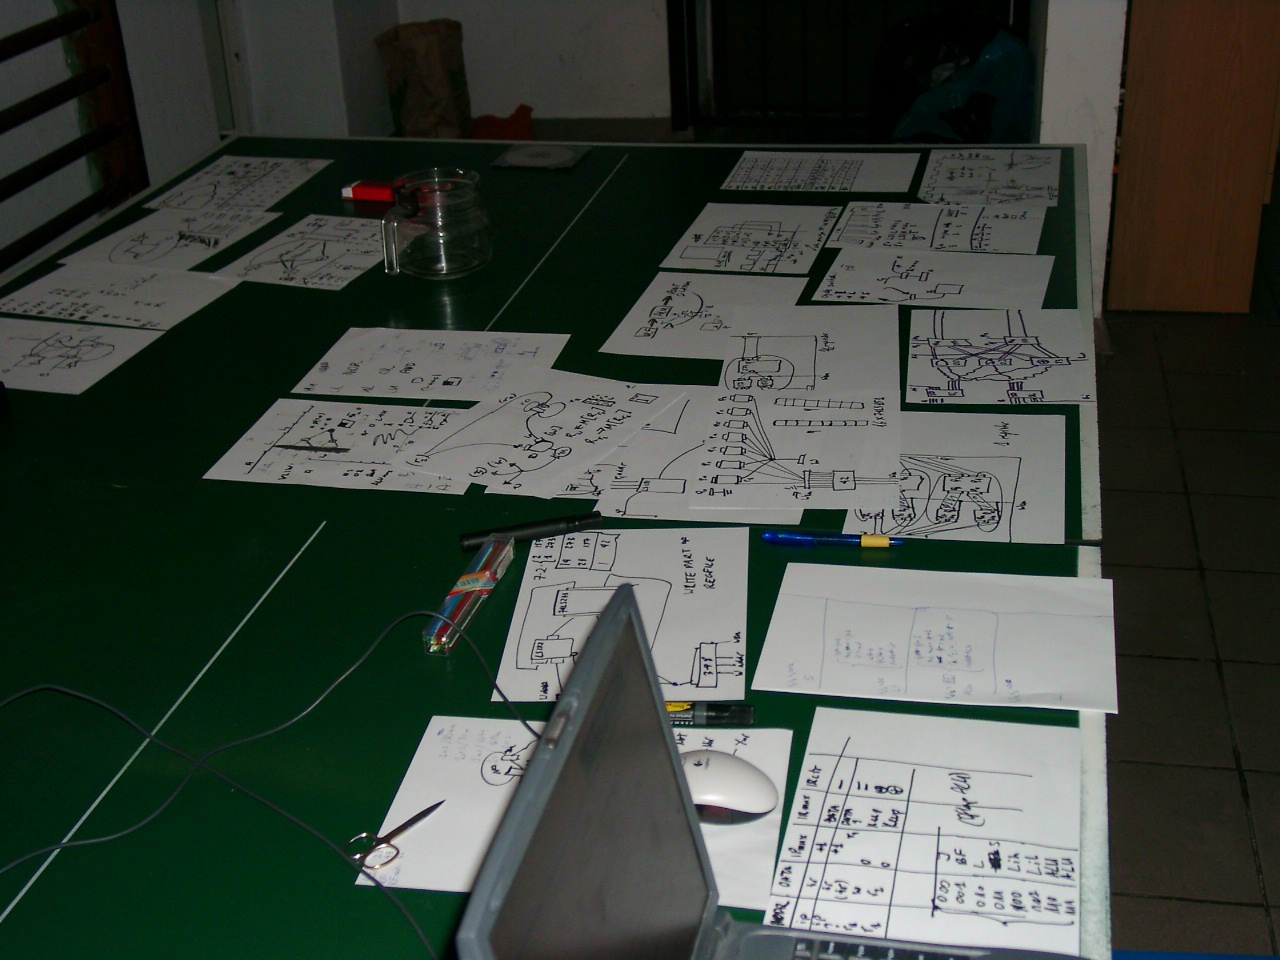
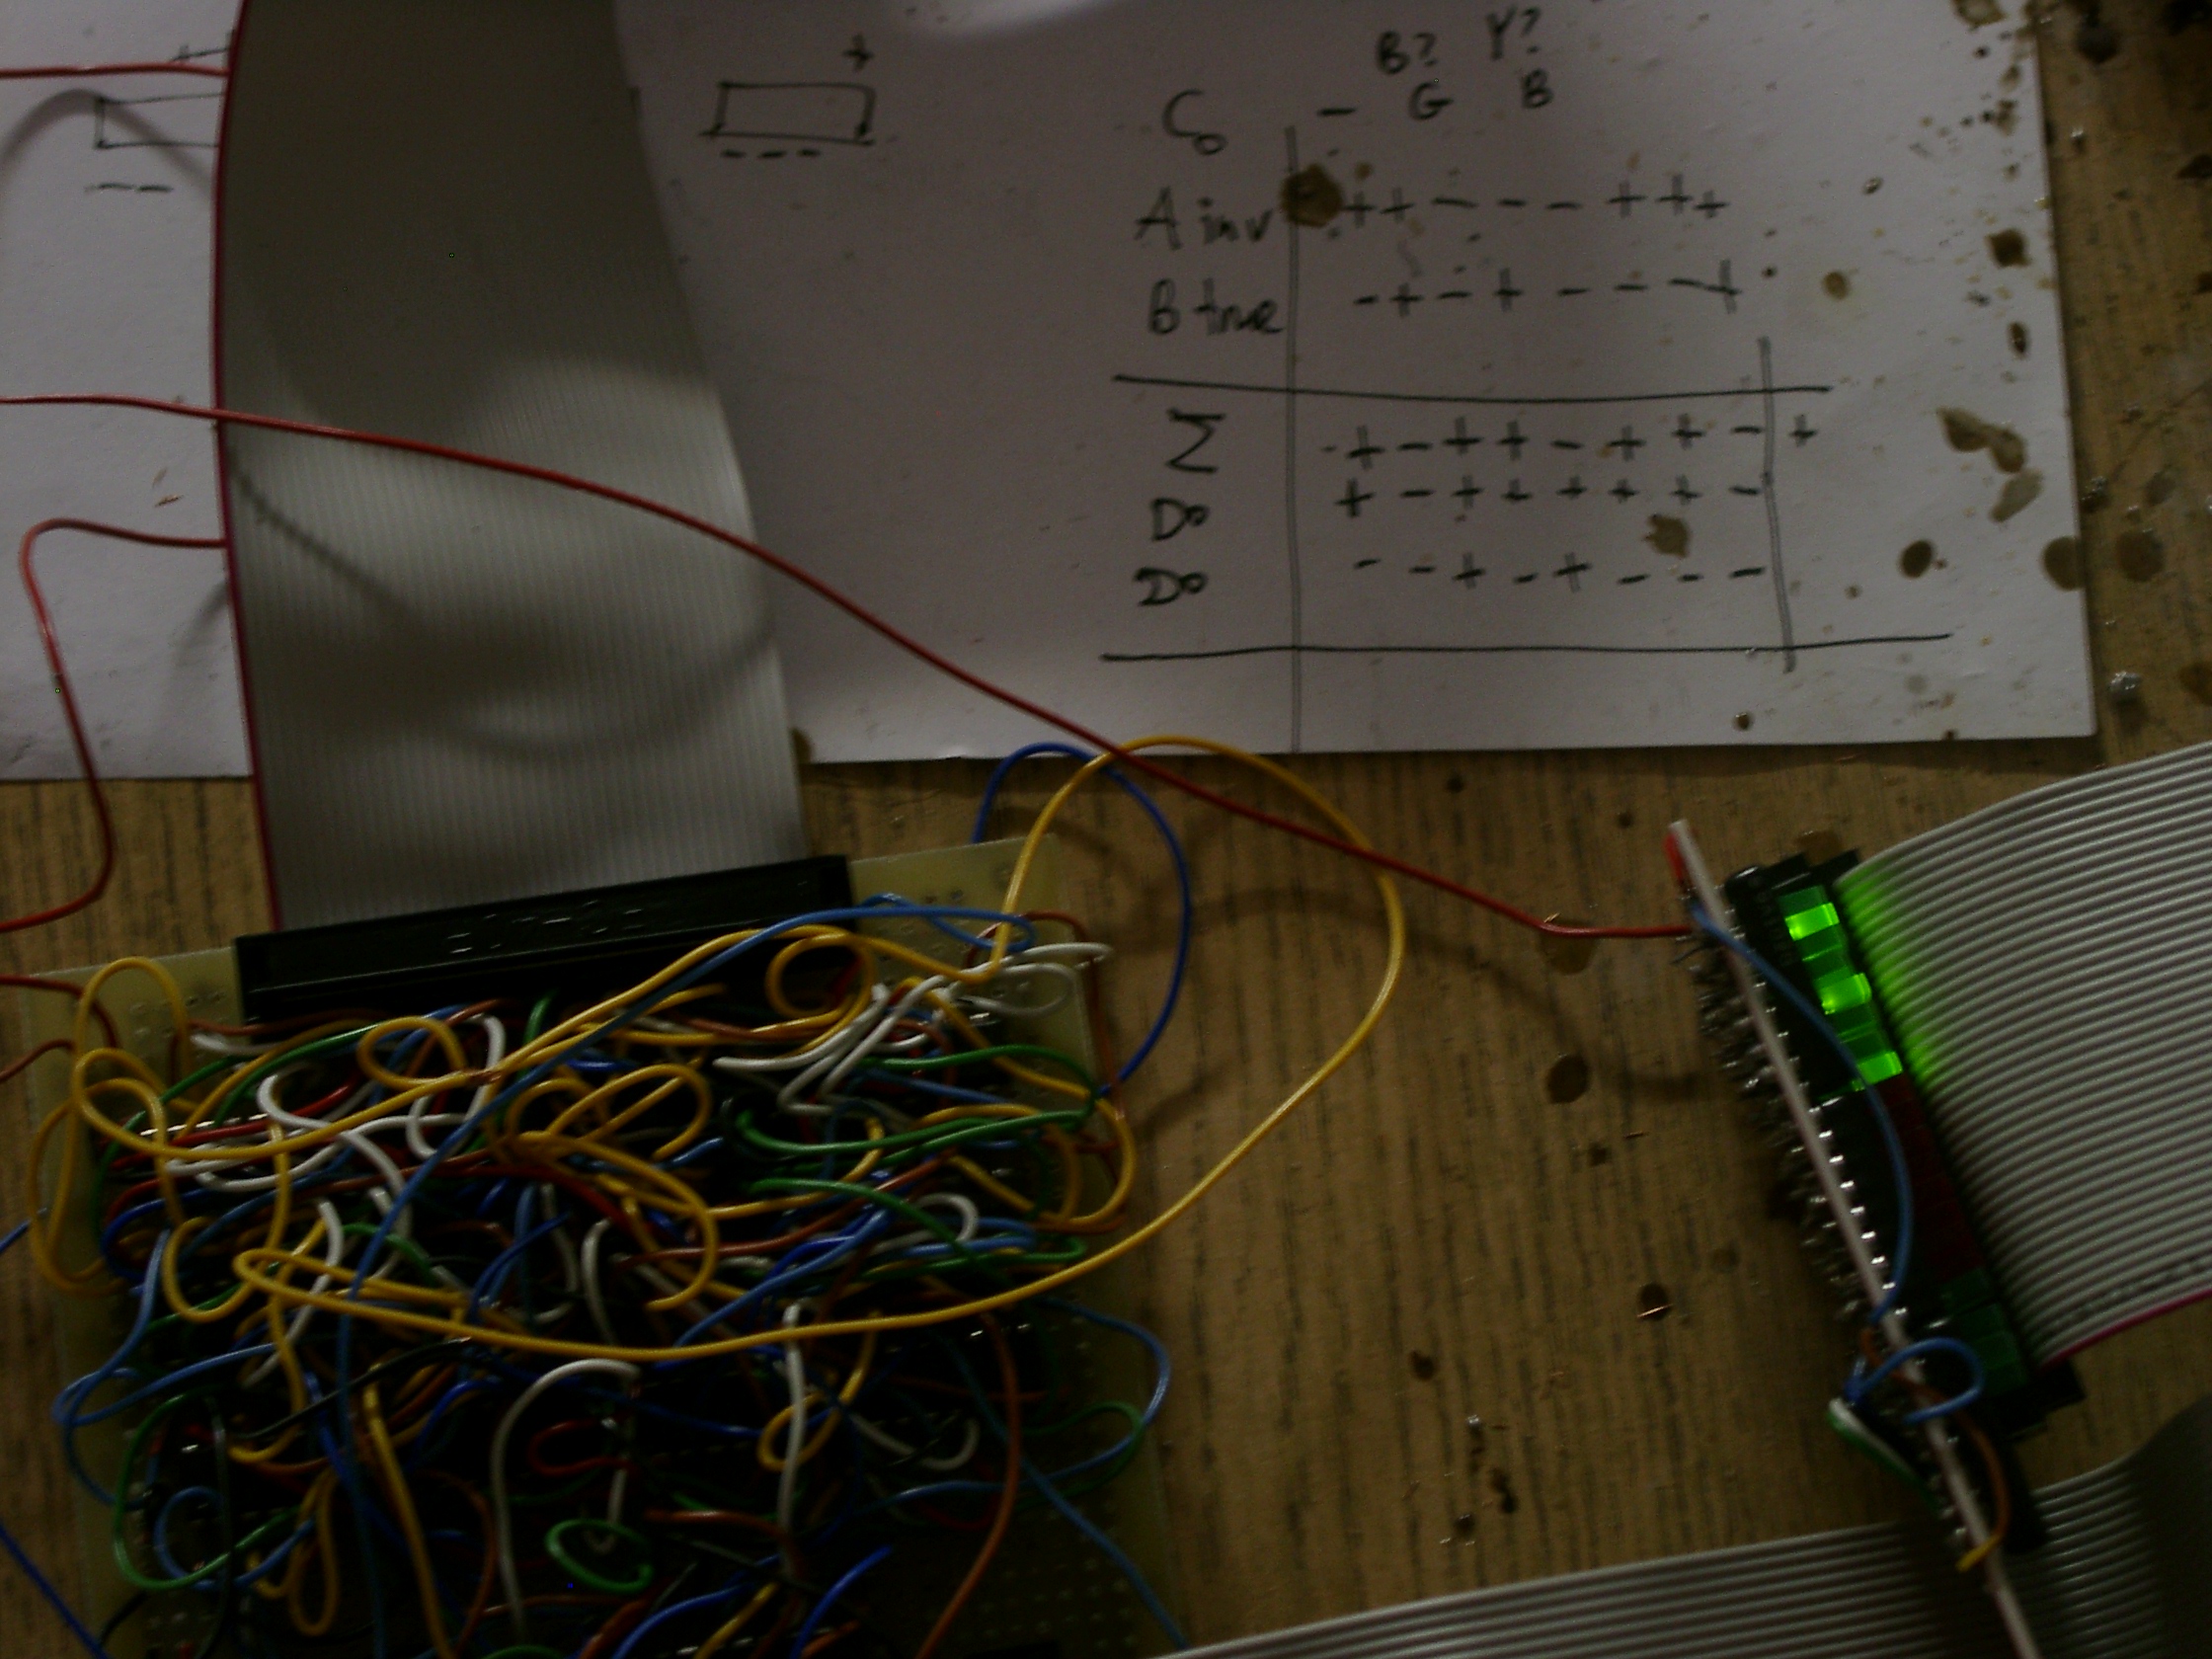
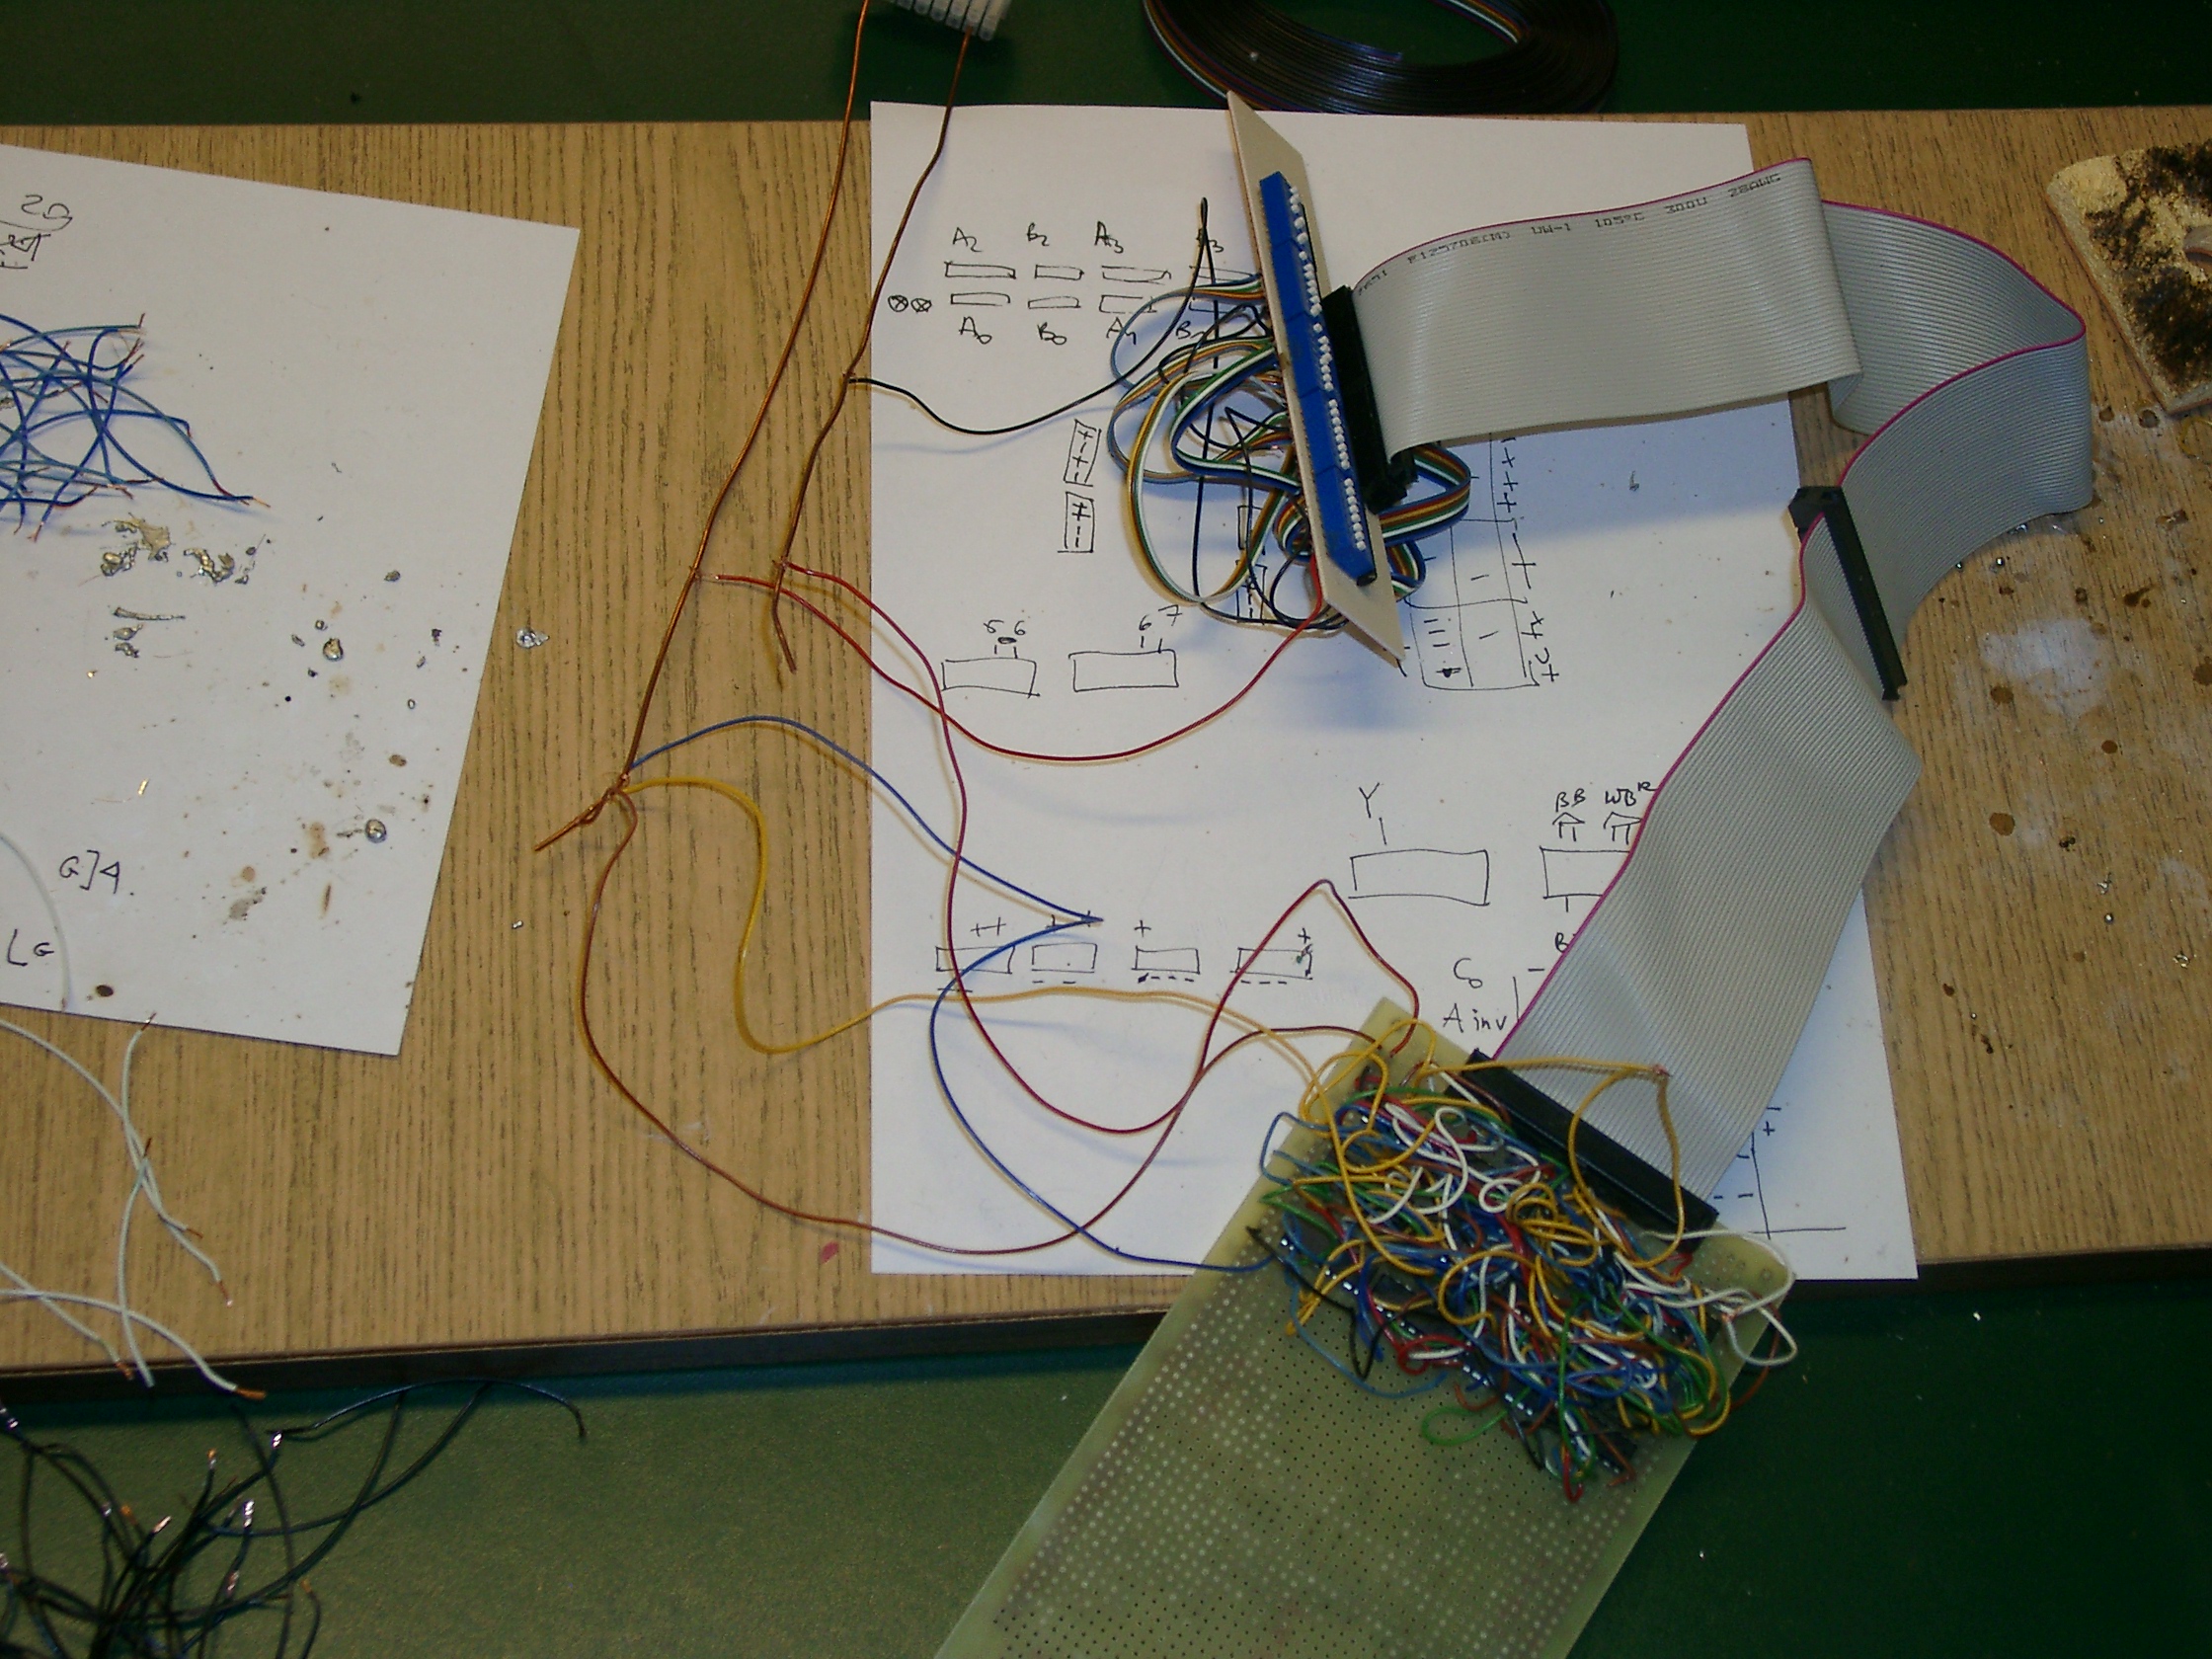
Very long time ago I tried to build a computer from 74LS parts. I didn't get too far, basically I had 40-bit switch input board, 40-bit led output board, and somewhat reasonable ALU.

I had plans to add register file and instruction decoder, and zero clue how to go from there to memory, clock, and I/O - but when I realized how painful soldering has been, and how much worse register file is going to be, I dropped the whole project.

It was still fairly cool way to learn electronics, and you can check the pictures and schematics.

So building entire computer still seems overwhelming, but here's a simpler idea.

Ingredients

  • I could skip soldering completely by just getting a stack of breadboards. It's going to be less compact, and I'll need to setup some kind of frame for them, but anything beats soldering.
  • I wondered about wirewrapping as another alternative to soldering, but nobody uses that.
  • PCBs seem even harder than soldering.
  • 74HC are apparently the new 74LS

Design tools

  • I've heard rumors that there are better languages than Verilog for modelling hardware. It would be nice to investigate one of them.
  • In addition to Verilog-level simulation, I'd like to do some wiring estimations before I start building it
  • Compiler for that architecture shouldn't be too hard to build.

What I actually want to build

  • I want ALU, register file, and instruction decoder
  • some RaspberryPi (or Arduino) will hold memory contents and interface with I/O - it will still need some kind of controller for it
  • Interface between RPi and computer will itself be somewhat complex
  • I'm not sure if I'll have separate clock, or if I'll use RPi as clock source
  • At some point I'd like to get memory - but still every bootup RPi will send contents to that memory before my computer will start running
  • Even if I get memory and clock off-RPi, it will still handle I/O, networking etc. It's nothing unusual, today every disk, every network card, every wifi dongle etc. have tiny computer on board.

Design ideas

  • The fancy multiport register file needs to go as wiring hell, and I can have classic CISC style specialized registers. It doesn't seem like a big difference when you look at Verilog, but there's a reason all old architectures did it this way, and trying to build one taught me that lesson.
  • Completely separate code and data will simplify a lot over shared memory architecture.
  • With separate code vs data, I can make code words as wide as I'd like - it sort of offloads part of decoder duties to compiler.
  • I don't think it will need any fancy microcode, then again any instruction will inevitably take multiple stages. I could start by having extremely wide words, and then moving parts of this logic gradually to instruction decoder.
  • It feels really hard not having 32bits. Maybe going 32bit is reasonable - just making registers wider is simple, ALU won't get any harder (ALU won't do multiply or anything crazy like that, we'll do that in software) except for some zero checks etc., so it's just a matter of wiring all that to memory interface.
  • 32bit architecture would definitely require RPi as controller, Arduino or small 74HC chip just won't have enough memory.

Where to start

  • I think the first step would be to see if Raspberry Pi is a viable memory controller. The RGB LED experiment with software PWM was sort of sanity checking that, but actual memory interface would be much more complicated.
  • If it can run at semi-reasonable speed, I can proceed to designing the rest of the system, and building it part by part. If it doesn't, the whole approach will need rethinking.

Tuesday, September 13, 2016

Adventures with Raspberry Pi: RGB Led Take 2

Once upon a time I tried to do software PWM to set different colors in a RGB Led. It failed.

LEDs are generally either on or off, with no intermediate states - so to get LED at half the intensity, you just turn it fully on for half the time, and blink it fast enough that human eye won't be able to tell the difference.

The problem was that the blinking wasn't fast enough. So now it's time for the long overdue debugging.

First, what the hell is the gem doing? Apparently it's simply writing to files like /sys/class/gpio/gpio17/value. So what if we just write to this file in a loop, skipping the gem? It turns out that's also just not fast enough.

So fallback plan, let's get wiringPi library (git clone git://git.drogon.net/wiringPi) and write it in C:


#include <stdio.h>
#include <wiringPi.h>

int main(int argc, char **argv)
{
  int r = atoi(argv[1]);
  int g = atoi(argv[2]);
  int b = atoi(argv[3]);
  int i;

  printf("Raspberry RGB %d %d %d blink\n", r, g, b);

  if (wiringPiSetup () == -1)
    return 1;

  pinMode(0, OUTPUT); // R
  pinMode(2, OUTPUT); // G
  pinMode(3, OUTPUT); // B

  for (;;)
  {
    digitalWrite(0, rand() % 256 <= r);
    digitalWrite(2, rand() % 256 <= g);
    digitalWrite(3, rand() % 256 <= b);
  }
  return 0;
}

Then compile with gcc -o rgbled rgbled.c -lwiringPi, and run like sudo ./rgbled 255 127 0
And it works!

Now obviously I don't want to write C programs for every trivial thing, so next step would presumably be using ffi interface to wiringPi instead of what PiPiper does with file-based interface.

Saturday, February 13, 2016

Adventures with Raspberry Pi: RGB Led

I've done regular LEDs before, so I wanted to try RGB Led now.

RGB Led is like red, green, and blue RED in one package, sharing common ground (so 4 pins total), supposedly allowing any color.

Now your first idea might be to use analog output and set diode intensity to control red, blue, and green, and that would work with a regular lamp, more or less, but diodes are really just on or off, so we need to do pulse width modulation.

Unfortunately it turns out that Raspberry Pi, ruby and pi_piper gem are not fast enough for that. This code really ought to work:

class RGBLed
  def initialize
    @blue  = PiPiper::Pin.new(:pin => 17, :direction => :out)
    @red   = PiPiper::Pin.new(:pin => 22, :direction => :out)
    @green = PiPiper::Pin.new(:pin => 27, :direction => :out)
  end

  def display(r,g,b)
    while true
      @red.send(if rand < r then :on else :off end)
      @green.send(if rand < g then :on else :off end)
      @blue.send(if rand < b then :on else :off end)
    end
  end

  def on
    @blue.on
    @red.on
    @green.on
  end

  def off
    @blue.off
    @red.off
    @green.off
  end
end

led = RGBLed.new
led.display(0.5,0.5,0.5)

With iterations being done at a bit oven 1300 iterations per second, it should provide half intensity white light. Instead it's flashing all the colors randomly, so presumably something downstream from ruby is being really slow.

There's also minor problem of green LED component being much brighter than others (all use 220 hm resistors, and changing I/O ports or resistors around doesn't change that).

All that is a shame, as software PWM is a pretty useful building block for a lot of things, and if that doesn't work, I won't be able to do a ton of other thing. If anybody has any ideas, please tell me.

Thursday, April 23, 2015

Adventures with Raspberry Pi: Weather in London

Welcome to another of my Raspberry Pi adventures.

Previously, I connected raspberry pi to monitor and keyboard and blinked some diodes.

It's time to go a lot further. The first step was removing monitor and keyboard, installing sshd, and just controlling the pi from a regular computer. That leaves two cables - ethernet, and USB power (currently coming from the computer).

I'll replace ethernet with wifi at some point, and reroute power to standalone charger so it doesn't need to be anywhere near the computer.

I also got new multimeter - the old one was totally broken, it wasn't just the battery.


Shift registers

Project for today is driving two 8-segment displays. Even ignoring 8th segment on each which is used for decimal dot (and only really included because 7 segments is a silly number), that's 14 wires. Raspberry Pi presumably has that many usable pins (I'm not entirely sure how many of 40 pins it has can be used for full I/O), but we really don't want to spend out entire pin budget on this.

Instead - we're going to use shift registers. Shift register I use - 74HC595 - has 3 inputs: data, clock, and latch. Whenever clock pin goes from low to high, it reads data pin, pushes data it has left by one, and puts whatever it got in newly emptied bit slot. In 8 such cycles, we can set the whole 8 bit register, one bit at a time.

While we're sending the register data, it is temporarily in inconsistent state, with mix of old and new data. To make sure that's never output, there's a separate latch pin - whenever it goes from low to high, register snapshots its state, and keeps that an the output unless we tell it to get new value.

This way we reduced number of required pins per display from 8 to 3.

74HC595 has a few extra pins (clear, output enable, etc.), but we just hardwire them as we don't rely on that functionality.

Here's a photo of work in progress: data is sent to shift register, and from there to 8-sigment panel, but it's just random bits.


Here's the code:


require "pi_piper"

class ShiftRegister
  attr_reader :data, :clk, :latch
  def initialize(data, clk, latch)
    @data  = data
    @clk   = clk
    @latch = latch
  end

  def out_bit(bit)
    @clk.off
    @data.send(bit == 1 ? :on : :off)
    sleep 0.001
    @clk.on
  end

  def out(byte)
    @latch.off
    byte.each do |bit|
      out_bit(bit)
    end
    sleep 0.001
    @latch.on
  end
end

Eight-Segment Display

Next step is really simple - instead of sending random data telling segments to turn on/off, we want to send it data corresponding to shapes of digits:


The code is really simple:


class EightPanelDisplay < ShiftRegister
  def out_symbol(symbol)
    # DOT, LR, L, LL, UR, U, UL, M
    case symbol
    when "0"
      out [0,1,1,1,1,1,1,0]
    when "1"
      out [0,1,0,0,1,0,0,0]
    when "2"
      out [0,0,1,1,1,1,0,1]
    when "3"
      out [0,1,1,0,1,1,0,1]
    when "4"
      out [0,1,0,0,1,0,1,1]
    when "5"
      out [0,1,1,0,0,1,1,1]
    when "6"
      out [0,1,1,1,0,1,1,1]
    when "7"
      out [0,1,0,0,1,1,0,0]
    when "8"
      out [0,1,1,1,1,1,1,1]
    when "9"
      out [0,1,1,0,1,1,1,1]
    else
      warn "Don't know how to output symbol #{symbol.inspect}"
    end
  end
end

We could even extend that to some simple letters or such symbols - not everything can be distinguished, for example B and 8 will look the same, but it might be useful.

Two digits

So we got down from 2x8 to 2x3 pins. We can do better - we can use same clock and data lines for both shift registers, and only have separate latch pins for each. As registers output whatever was the data inside them at the time they got the most recent rising edge on their latch pin, as long as register's latch pin is steady (doesn't matter even matter if high or low), it doesn't matter what they get on other pins.

There are other ways to connect registers, including daily chaining shift registers so they shift into each other thanks to their extra pins, and we could get away with just 3 instead of 4 raspberry pi pins, but this simple setup is good enough.


 And corresponding code:


pin4  = PiPiper::Pin.new(:pin =>  4, :direction => :out)
pin17 = PiPiper::Pin.new(:pin => 17, :direction => :out)
pin22 = PiPiper::Pin.new(:pin => 22, :direction => :out)
pin27 = PiPiper::Pin.new(:pin => 27, :direction => :out)

register_a = EightPanelDisplay.new(pin4, pin27, pin17)
register_b = EightPanelDisplay.new(pin4, pin27, pin22)

Weather in London

After we had the hardware going, software is really simple - a simple JSON request to OpenWeather API, convert Kelvin to Celsius scale, and send it to our display.

And here's current weather in London, +9C (there's no need for sign, as London never has winters):


And the code:

require "json"
require "open-uri"

url = "http://api.openweathermap.org/data/2.5/weather?q=London,uk"
weather = JSON.parse(open(url).read)

temp_c = weather["main"]["temp"] - 273.15
temp_display = "%02d" % temp_c

register_b.out_symbol temp_display[0]
register_a.out_symbol temp_display[1]

Friday, April 17, 2015

Adventures with Raspberry Pi: basic blinkenlights

Every adventure starts with hello world, and that one took forever.

Here's the setup:
Sunfounder GPIO extension board + breadboard make it so much easier - instead of wiring everything manually I just plug the whole damn thing, and it even has printed pin numbers on the board - Raspberry Pi decided to have insane randomly assigned pin numbers, and then every library for it uses its own different insane randomly assigned pin numbers - I remember back in the days when people numbered pins from 1 to 40 starting in one corner and going clockwise. What the hell happened?

I ran into a lot of annoying issues:
  • My old raspberry Pi (model B+, not 2 B) was not compatible with the kit, so I had to get new one
  • SD card I used for old Pi was of the big kind, so I had to take small one out of my phone instead
  • I needed to install confusingly named ruby1.9.1-dev apt package (which actually contains 1.9.3) before any gems would install.
  • And my voltmeter seems dead, it's probably just batteries, but it uses 9V batteries which I don't have spares for so I won't be able to check that until tomorrow.
  • Why do resistors have to use this ridiculous color coding system instead of just printing damn values as numbers? I get it that back in the 1950s printing numbers would be hard, but come on. Figuring out which resistor is which was pain, and I didn't have voltmeter to test them. (I never learned this damn color coding, as it was way easier to just check them with a meter).
  • It took a few tries to figure out which pin numbering system Pi Piper uses - apparently the same one as is printed on Sunfounder expansion board. That will make it a lot easier.
The first program is:


require "pi_piper"
pin4 = PiPiper::Pin.new(:pin => 4, :direction => :out)
pin17 = PiPiper::Pin.new(:pin => 17, :direction => :out)
loop { pin4.on; pin17.off; sleep 0.25; pin17.on; pin4.off; sleep 0.25 }

Can you guess what it does? No prizes.

It's not much, but with all hardware projects just getting basic hello world typically takes really long time and runs into a lot of annoying problems. Now that's behind me, I might be able to do some cooler stuff.

3D printer adventures and Raspberry Pi adventures will at some point join, but it will take a while.

Friday, September 06, 2013

Wednesday, October 17, 2012

Blinkenlights at London Hackspace

I paid a visit to London Hackspace yesterday hoping to play with laser cutter and 3d printer. And of course due to my luck neither laser cutter nor any of 3d printers they had worked, so I decided to do something else and play with electronics.


That's not terribly complicated, but it's my first ever thing using 555 timer circuit.

Due to power cable shortage I had to use red cable for both Vcc and Gnd, I'm totally aware it goes against the most important thing in circuit design - color coding your cables.

Long time ago I made a somewhat serious attempt at building a computer, but it never got past ALU phase since just wiring all the damn things was taking forever.

Here are some photos:


I'm somewhat tempted to give it another go someday, especially if I can find either how to print PCB or find some other way to deal with wiring, since the wiring was the biggest problem as you can probably see on the photos - elegant schematics turned into Flying Spaghetti Monster.

Anyway, London Hackspace is open for visitors every Tuesday evening, so if you live in London or are just passing by it's a good idea to drop by and see what's there.

I haven't decided if I want to get seriously involved or not, but I plan to at least give it another go - maybe the next time laser cutter and 3d printer will be working, or I'll find someone knowledgeable about PCB etching (since they have etching station over there too).

Actually does anybody know if laser cutter can be used to make PCBs? It sounds like it should since it can make both traces (by cutting a bit into top copper layer) and holes (by cutting all the way through) and with careful positioning it might even be able to do the same to the bottom layer in matching way. It sounds a lot less messy to just cut it with lasers rather than mess with ton of chemicals, but maybe it doesn't really work as well I as hope.

Sunday, April 26, 2009

Arduino and Wii Nunchuck to control iTunes


Here's my latest project. It involves way too many technologies for the sole purpose of controlling iTunes with Wii Nunchuck. Signal flow is almost uni-directional, so let's go from step by step from the Nunchuck to iTunes.

Wii Nunchuck and I2C

I2C is a very simple protocol back from the 80s. There are four wires. Vcc (traditionally +5V, but lower voltages are used with I2C too) and ground are obvious. Clock and data lines require some more explanation.

I2C is a bus protocol - so multiple devices can operate on the same wires. Even in the simplest configuration we have a master (Arduino board), and a slave (Wii Nunchuck), both of which can read and write to the same lines. And it doesn't take much science to know that when one device writes 0 while other writes 1 to the same line hilarity ensues, also known as a circuit shorted, everyone dies.

The way I2C and many other protocols solve this problem is by using "open drain" design. In open drain no device is allowed to write 1 to the bus - you can only write 0 (connect to the ground), or leave the connection in high impedance state. The bus is connected to Vcc using a pull-up resistor. This way if any device writes 0, bus will be at 0. If none is writing, it will be at 1. That's somewhat unintuitive at first, if it confuses you just check the Internet for explanation.

Fortunately Arduino has hardware support for I2C over its analog input pins 4 and 5, and library for that (called Wire) is included in the distribution. So it would seem that we don't have anything to do... except it all doesn't work.

Now I'm not 100% sure about that, but here's my guess what happens. Arduino analog input pins can be set to output low, output high, high impedance, and high impedance with pull-up (allegedly 20k). For I2C we're interested in output low, and high impedance with pull-up. However - this built-in pull-up seems too weak, or it's not working for some other reason. Directly connecting clock and data lines to Vcc via 10k pull-up resistors (lower resistance = more pull-up, at least until you fry it) makes it all work. Nice way to spend an entire night, isn't it?

So after cutting the Wii Nunchuck wire, the connections are:
  • Nunchuck white (GND) to Arduino GND
  • Nunchuck red (VCC) to Arduino 5V
  • Nunchuck yellow (clock) to Arduino analog input pin 5
  • Nunchuck green (data) to Arduino analog input pin 4
  • Clock line to VCC via 10k resistor
  • Data line to VCC via 10k resistor

Speaking with Wii Nunchuck

Now that we have electric signals handled, we need to engage Wii Nunchuck in a meaningful conversation. It has device ID 0x52 (82), and we need to write 0x40 0x00 (64 0) to initialize it, and then request data in packets of six bytes, and write 0x00 (0) to confirm we got it.

Now I try to avoid word like "retarded" on this blog, but Wii Nunchuck data is "encrypted", and we need to "decrypt" it first:
  • decrypted = (0x17 XOR encrypted) + 0x17
Seriously, whoever came up with this fully deserves this adjective.

After that it's just a straightforward decoding, and we dump data onto serial interface. Here's full code:
#define CPU_FREQ 16000000L
#define TWI_FREQ 100000L

#include <Wire.h>

int diode = HIGH;

void blink() {
digitalWrite(13, diode);
diode = (diode == HIGH) ? LOW : HIGH;
}

void setup() {
Serial.begin(19200);
pinMode(13, OUTPUT);
Wire.begin();
Wire.beginTransmission(0x52);
Wire.send(0x40);
Wire.send(0x00);
Wire.endTransmission();
}

void send_zero() {
Wire.beginTransmission(0x52);
Wire.send(0x00);
Wire.endTransmission();
}

void loop() {
int cnt = 0;
uint8_t outbuf[6];

Wire.requestFrom(0x52, 6);
while(Wire.available()) {
if(cnt < 6) {
outbuf[cnt] = (0x17 ^ Wire.receive()) + 0x17;
}
cnt++;
}

int b = ~outbuf[5] & 3;
int joy_x = outbuf[0]-125;
int joy_y = outbuf[1]-128;
int accel_x = (outbuf[2] << 2 | ((outbuf[5] >> 2) & 0x03)) - 500;
int accel_y = (outbuf[3] << 2 | ((outbuf[5] >> 4) & 0x03)) - 488;
int accel_z = (outbuf[4] << 2 | ((outbuf[5] >> 6) & 0x03)) - 504;

Serial.print("B=");
Serial.print(b);
Serial.print(" XY=");
Serial.print(joy_x);
Serial.print(",");
Serial.print(joy_y);
Serial.print(" XYZ=");
Serial.print(accel_x);
Serial.print(",");
Serial.print(accel_y);
Serial.print(",");
Serial.print(accel_z);
Serial.print("\n");

send_zero();

blink();
delay(50);
}


Controlling iTunes


iTunes is an outrageously bad music player, but at least it has one redeeming quality of being controllable from command line via AppleScript.

By issuing silly commands like
tell application iTunes
next track
end tell
we can control its basic functionality, what will be good enough for us.

We also need to get some information from iTunes. It doesn't have "increase/decrease volume" commands, so we need to find current volume, and then set it to higher/lower values. It also doesn't have a single play/pause command, so we need to figure out what state we're in - if we're playing then pause, otherwise play. Some of the nasty code refactored to OSA class to keep ITunes class a bit cleaner, but not by much.

The code doesn't depend on the rest of the project, so you can use it in your own projects, or just look what it's doing and use it directly from command line.

class OSA
def get(var)
`osascript -e 'tell application "#{name}" to #{var}'`
end
def do!(cmd)
system 'osascript', '-e', %Q[tell application "#{name}"], '-e', cmd, '-e', 'end tell'
end
end

class ITunes < OSA
def name
'iTunes'
end
def get_volume
get('sound volume as integer').to_i
end
def get_state
get('player state as string').chomp
end
def set_volume(v)
system 'osascript', '-e', %Q[tell application "iTunes" to set sound volume to #{v}]
end
def next!
do! 'next track'
end
def prev!
do! 'previous track'
end
def pause!
do! 'pause'
end
def play!
do! 'play'
end
def pause_flip!
if get_state == 'playing'
pause!
else
play!
end
end
def vol_up!
set_volume(get_volume + 5)
end
def vol_down!
set_volume(get_volume - 5)
end
end


Reading data from Arduino


Communication is strictly uni-directional. Arduino writes to virtual serial interface, and we're reading from it as the data arrives. The data is current position of buttons, analog stick, and accelerometer. We're not really interested in any of it directly - we care about button presses and releases, and about stick going up/down/left/right (analog stick is used only as fake D-pad here). So change of state, not state as such.

For buttons it's straight forward. We get a bit for each button, so we just check it. For the stick, there's a small trickery involved. The range on each axis is from about -100 to +100, so we could just set points like +64/-64 from which we count it as a up/down. But what if stick is hold around that level? Sensor is analog (and user's hand is shaking), so if user hold the stick around +64, the reading would go +64, +63, +65, +63, +64, +64, +65 ..., what such naive implementation would treat as plenty of up presses, even though there weren't any.

This is an extremely common problem in electronics, and there's a simple solution - hysteresis. We simply take two slightly different levels for two sides of the same transition. If stick goes above +64 it's up. If it goes below +48 it's neutral. If it's betweer +48 and +64, we just keep it where it was. So unless the user has Parkinsons's and wiggles it a lot, it won't register any spurious clicks.

Other than that the code is pretty straightforward. We throw away first five readings because electronics tend to take some time after power-up to stabilize. And with every reading we set state to what we read, put all transitions into @cur_events instance variable, and yield.

require 'rubygems'
require 'serialport'

class SerialDevice
def get_device
while true
dev = Dir["/dev/cu.usb*"][0]
return dev if dev
sleep 1
end
end
def initialize
@sp = SerialPort.new(get_device, 19200)
end
end

class Nunchuck < SerialDevice
attr_reader :cur_events, :b, :sx, :sy, :sxs, :sys
attr_accessor :ax, :ay, :az
def initialize
super
@b,@sx,@sy,@ax,@ay,@az,@sxs,@sxs = 0,0,0,0,0,0,0,0
end
def each_state
skip = 5
while line = @sp.readline
unless line =~ /B=(\d) XY=(\S+),(\S+) XYZ=(\S+),(\S+),(\S+)/
puts line
next
end
if skip > 0
skip -= 1
next
end
@cur_events = []
self.b, self.sx, self.sy, self.ax, self.ay, self.az = [$1,$2,$3,$4,$5,$6].map{|x| x.to_i}
yield
end
end
def b=(nv)
@cur_events << :press_lo if nv & ~@b & 1 != 0
@cur_events << :release_lo if @b & ~nv & 1 != 0
@cur_events << :press_hi if nv & ~@b & 2 != 0
@cur_events << :release_hi if @b & ~nv & 2 != 0
@b = nv
end
def hysteresis(new_measurement, old_state, *ranges)
while true
state, bounds = ranges.shift, ranges.shift
if bounds.nil? or
(new_measurement < bounds.first) or
(new_measurement < bounds.last and old_state <= state)
return state
end
end
end
def sxs=(nv)
@cur_events << :sxs_change if nv != @sxs
@sxs = nv
end
def sys=(nv)
@cur_events << :sys_change if nv != @sys
@sys = nv
end
def sx=(nv)
self.sxs = hysteresis(nv, sxs, -1, -64..-48, 0, 48..64, 1)
@sx = nv
end
def sy=(nv)
self.sys = hysteresis(nv, sys, -1, -64..-48, 0, 48..64, 1)
@sy = nv
end
def raw
[@b,@sx,@sy,@ax,@ay,@az]
end
end


All of it together


The final bit of code is trivial. We just instantiate ITunes and Nunchuck objects, and connect them in obvious way:
  • Press C to play/pause
  • Analog stick right/left for next/previous
  • Analog stick up/down to increase/decrease volume
This style of volume control sucks, but if I tried to run two osascript commands on every reading (if stick is above +64 increase volume, if under -64 decrease volume), it would be too slow, at least in this naive implementation, and you'd only see there would be a pretty big lag between moving the stick and iTunes reacting.

i = ITunes.new
n = Nunchuck.new
n.each_state do
if n.cur_events.include?(:sxs_change)
if n.sxs == 1
i.next!
elsif n.sxs == -1
i.prev!
end
end
if n.cur_events.include?(:sys_change)
if n.sys == 1
i.vol_up!
elsif n.sys == -1
i.vol_down!
end
end
if n.cur_events.include?(:press_hi)
i.pause_flip!
end
p(n.raw + n.cur_events)
end

Sunday, April 12, 2009

Arduino microcontroller and Ruby to display song lyrics


I got myself an Arduino, Seeeduino version to be more exact, and I'll build a robot based on it. I'm using the word "robot" very vaguely, I just want to make a bunch of fun projects taking advantage of the microcontroller.

The first non-trivial project I did was displaying lyrics for music played from a computer. I'll get to the interesting bits in due time, let's start with the basics.

Lyrics


The first problem was finding lyrics with timing information. I really wanted it to play Still Alive from Portal, but I couldn't find any timed lyrics. And I was far too lazy to find accurate timing myself. Then I remembered - many Stepmania songs already come with timed lyrics. So I wrote a parser to their LRC format. It is much more complicated than you'd expect - we only have two lines of 16 characters each, and even silly songs are much longer than that. So there's quite a bit of logic necessary to break longer lines into pairs of 16-character fragments, and extrapolate their timing. API for this library is very simple: LRC.new(file_handle).each_line{|top_line, bottom_line, time| ...}.

class Line
attr_reader :text, :start_time, :end_time
def initialize(text, start_time, end_time)
@text, @start_time, @end_time = text, start_time, end_time
end
def to_s
"#{@text} [#{@start_time}..#{@end_time}]"
end
def text_fragments
unless @text_fragments
@text_fragments = []
text = @text.sub(/\|/, ' ')
while text != ""
text.sub!(/\A\s*/, "")
if text.sub!(/\A(.{1,16}(\b|\Z))/, "")
@text_fragments << $1
else text.sub!(/\A(.{1,16})/, "")
@text_fragments << $1
end
end
end
@text_fragments
end
def text_fragment_pairs
pairs = ((text_fragments.size+1) / 2)
pairs = 1 if pairs == 0
pairs
end
def duration
end_time ? end_time - start_time : 2.0
end
def each
fragments = text_fragments
time_shift = duration / text_fragment_pairs
time = start_time
while fragments.size > 0
yield(fragments.shift||"", fragments.shift||"", time)
time += time_shift
end
end
end

class Lrc
def initialize(fh)
entries = []
fh.each{|line|
line.sub!(/\s*\Z/, "")
line =~ /\A\[(.*?)\](.*?)\Z/ or raise "Cannot parse: #{$1}"
time, txt = $1, $2
next unless time =~ /\A(\d+):(\d+\.\d+)\Z/
entries << [$1.to_i*60+$2.to_f, txt]
}
@lines = []
entries.size.times{|i|
cur, nxt = entries[i], entries[i+1]||[nil]
@lines << Line.new(cur[1], cur[0], nxt[0])
}
end
def print!
@lines.each{|x| puts x}
end
def each_line(&blk)
@lines.each{|line|
line.each(&blk)
}
end
end


Seeeduino board


I'll get back to the computer-side software, let's go to the hardware for a moment. Seeeduino board is awesomely easy to use, it uses mini-USB connection for power (it can take battery power too), for uploading programs, and for emulated serial communication. No extra cabling necessary.


Top pins are digital I/O 0 to 13 (some also work as PWM / analog output, but we're not using this feature here), bottom pins are analog input and power pins. On the left there's USB mini-B, external power in, and three switches - manual/auto reset (set to auto), 5V/3.3V (set to 5V, as we need 5V on output), and USB/external power (there is no external power so it works as a power switch).

There are a few interesting diodes, that you can see blinking on the movie. Red RX and TX are for USB communication - RX is blinking every time we receive another lyrics line, we're not sending anything back here. The green diode is connected to digital pin 13, you can conveniently use it a pulse to verify that your program is actually running and not hanging up somewhere.

LCD display


This is surprisingly complicated piece of equipment. It turns out almost all one and two line character LCD displays in the world follow the same HD44780 standard. Which is quite complex. Fortunately there's a library for Arduino for handling them, whih solves most of our problems.

The first big complication is that it needs 3 different voltages - 5V for electronics, 4V for LCD backlight, and unspecified voltage for liquid crystals which regulated contrast.

We already have 5V of course, that's what USB uses, and what all the TTL uses. Backlight requires 4V plus minus 0.5V according to datasheets, but that's a lie, it's barely visible around 3.5V. I tried to cheat and put some resistor between its positive pole and 5V, but that didn't really work, I would need a very small resistor as its actual power not just reference voltage. I finally figured out how to get 4V with a proper mix of batteries - two 1.2V rechargables, and one 1.5V alkaline, giving it a grand total of, well 3.84V at the moment, I probably need to recharge them. Surprisingly AAA batteries work well enough in AA battery holder without any extra hacks.

I might be wrong, but the third voltage, needed to drive liquid crystals, seems to be just reference voltage, and not actually used to power anything. Setting it too low makes liquid crystals all black, setting it too high makes them all transparent. The idea is to have on ones black, and off ones transparent. It turns out putting 5kohm between ground and contrast pin (achieved by a pair of 10kohm resistors in parallel) works well enough. It seems to drive it to about 0.96V. I'm not sure what's the optimal level, but 1kohm and 10kohm are too extreme for convenient viewing.

The LCD circuit has 8 data pins, only 4 of which are used, R/W pin, which is grounded, so we only ever write there, and two extra control pins.

Data pins are connected to Arduino pins 7-10, control pins to Arduino pins 2 and 12, all for no particular reason, these are just library defaults.

Timing


I first wanted to put timing and lyrics into program driving Arduino, but there are two big timing issues. First, song on computer and lyrics need to start at the same time - what could be achieved either by some Arduino-computer communication, or by me pressing two buttons at the same time. Ugly but possible. The second problem is that Arduino doesn't seem to have any real-time clock, or instruction timer. I might be wrong about that, there wasn't any obvious one in documentation. It has good delay function, but driving LCD requires waiting for it, and we would need to do some nasty guessing how long it took. There's also the third problem that every new song would require uploading new Arduino program.

So I decided instead to send lyrics from computer to Arduino as they are played. It's quite nice because the same program and circuit can be repurposed as a Twitter client or anything else I want.

Arduino program


The program is unbelievably easy. We initialize USB serial line at 9600 baud, initialize LCD, and set pin 13 (driving that green diode) to output mode.

Then if any character is available on serial line - if it's NUL/LF/CR we treat it as clear screen, otherwise we display it. The display thinks it has 40 characters per line, so we can fill it with spaces and we don't need a command to move cursor to the second line. Clearing the screen resets the cursor.

If there's no serial data available we blink the diode and wait 100ms. All the heavy lifting is provided by LCD4Bit and Serial libraries.

And yes - this is C++. I forgot to mention. It doesn't have main() function. As Arduino can run only one program, and it never exits, it has two functions. setup() to start it up, and loop() which is run in a loop automatically. There are some complications here, somehow resetting the serial line causes setup() to rerun, I'm not sure why. Maybe it is a segfault even, it's C++ after all. And LCD doesn't become operational immediately, it takes a second or so and if we write in this time data is going to be ignored. But let's just skip that for now.

#include <LCD4Bit.h>

LCD4Bit lcd = LCD4Bit(2);

void setup() {
Serial.begin(9600);
pinMode(13, OUTPUT);
lcd.init();
lcd.printIn("Ready to play");
}

int diode = HIGH;

void loop() {
int val;

if(Serial.available()) {
val = Serial.read();
if(val == 0 || val == 10 || val == 13)
lcd.clear();
else
lcd.print(val);
} else {
digitalWrite(13, diode);
diode = (diode == HIGH) ? LOW : HIGH;
delay(100);
}
}


Ruby lyrics driver


Ruby gem serialport provides all our serial communication needs. Just create an object using SerialPort.new("/dev/cu.usbserial-A9009rh4", 9600) (name of serial over USB device will differ), and use #write(data) to write there.

There are just a few more complications, to get good camera shots we need to wait a few seconds between initializing serial communication and starting to send data. 3s would be enough, but it defaults to 15s so I can position the camera etc.

And we want mplayer to start without any delay and without any garbage on the output, so -really-quiet -hardframedrop -nocache and redirecting everything to /dev/null

require 'rubygems'
require 'serialport'
require 'lrc_extract'

class Arduino
def initialize
@sp = SerialPort.new(Dir["/dev/cu.usb*"][0], 9600)
end
def print(text0, text1)
@sp.write("\n"+text0+(" " * (40-text0.size))+text1)
end
def countdown(i)
i.times{|j|
@sp.write("\n#{i-j}")
sleep 1
}
@sp.write("\nGO!")
end
end

class Song
def initialize(song_dir)
@mp3_file = Dir["#{song_dir}/*.mp3"][0]
@lrc_file = Dir["#{song_dir}/*.lrc"][0]
raise "No mp3 file in #{song_dir}" unless @mp3_file
raise "No lrc file in #{song_dir}" unless @lrc_file
@lrc = Lrc.new(open(@lrc_file))
end
def each_line(&blk)
@lrc.each_line(&blk)
end
def fork_mp3_player!
unless pid = fork
exec "mplayer -really-quiet -hardframedrop -nocache '#{@mp3_file}' >/dev/null </dev/null 2>/dev/null"
end
pid
end
end

class Timer
def initialize
@start_time = Time.now
end
def sleep_until(time)
cur_time = Time.now - @start_time
to_sleep = time - cur_time
sleep(to_sleep) if to_sleep > 0
end
end

a = Arduino.new
song = Song.new(ARGV[0] || "songs/Dance Dance Revolution 6th Mix -Max-/WWW.BLONDE GIRL (MOMO MIX)")
a.countdown((ARGV[1] || 15).to_i)

begin
pid = song.fork_mp3_player!
timer = Timer.new
song.each_line{|text0, text1, line_time|
timer.sleep_until(line_time)
puts "#{text0} #{text1}"
a.print(text0, text1)
}
Process.waitpid pid
rescue
system "kill", "-9", "#{pid}"
raise
end


What next


If someone has Still Alive lyrics with timing, I'll upload a video of that to Youtube. I thought about Twitter client or something like that, but 32 characters make even 140 seem very very long. The display is also quite slow, so smoothly scrolling letters probably won't work too well. It might be because we use it in write only mode, so instead of waiting for busy flag to become false we simply wait maximum necessary delay. That's just a guess.

Anyway, I have plenty of things to connect to Arduino, if anything interesting ever comes out of it I'll let you know.

Saturday, January 26, 2008

Keyboard layout should not be a global setting

mac kitty by atomicshark from flickr (CC-NC-SA)

Most computers these days are laptops. Their computing power got quite decent, and they're even becoming reasonably powerful for moderate gaming. One of the major problems left is typing on them. Laptop keyboards, especially in smaller laptops, are tiny, have very small keys, no numeric keypad and painfully unergonomic shape which forces you to keep your hands in unnatural position. As keyboard and screen are attached to each other there's no way to make it comfortable for both your eyes and your hands. To make matters worse recently many laptops started to include a big touchpad which doubles as a mouse button, so when you try to type, and you have to keep your hands very close to each other because the keyboard is so small, you're very likely to accidentally "press mouse button" by touching the touchpad. Basically they're completely unsuitable for touch typing, and they will forever stay this way, because it's impossible to build a decent keyboard that fits in laptop form factor. That doesn't mean that all of them are equally bad, the worst one I've seen so far was Macbook's, and some in bigger laptops are only annoying instead of being actively painful.

This all means that unless the only thing you type are Google search queries, you need a real keyboard for your computer in addition to the internal keyboard. Most people don't seem to care about this, but I really like Dvorak layout. And here lies the problem because in every operating system I've ever seen keyboard layout is a global setting, not per-device setting. I want to touch type in Dvorak on external keyboard, but as touch typing on laptop keyboard is not possible I'd prefer it to stay QWERTY, so I can at least see what key I'm pressing. However as keyboard layout is global rather than per-device setting, I have to manually switch it every time I attach or detach external keyboard.

Pressing keyboard layout switcher a couple times a day is maybe not the worst usability problem out there, but could KDE/GNOME developers please improve it ? That would be really really great.

Wednesday, December 26, 2007

Looking for a new computer

Late night by Selva Morales from flickr (CC-NC)
Because my hatred towards my Macbook reached unprecedented level, and I didn't take my old desktop with me to London, I' looking for a new computer. I probably won't be buying it for another few weeks, but here's a rough spec/wishlist (which reads a lot like "why Macbook sucks" list):

  • The options are - one good laptop for work+home, or shitty laptop at work + good desktop at home. Right now I think a good all-purpose laptop would be a better solution.
  • At least 2GB RAM, 4GB even better. That's really non-negotiable, computers with less than that are good for little more than web browsing.
  • Probably dual boot Ubuntu (for 90% of normal use)/XP (for occasional gaming/compatibility testing). I've seen Vista and I don't like it. Most laptops these days come with Vista by default, but I can always wipe it out.
  • At least 1440x900 or even better 1680x1050. Macbook resolution of 1280x800 is painful.
  • I don't really care about screen size that much, resolution is much more important. 17-inch screen usually means bigger keyboard and that's a nice thing to have, even if 15-inch screen with good resolution is all right.
  • I would like to play something more recent than Quake 3, so integrated GPU is completely out of a question. 8600M GT with 256MB memory would certainly be nice. Something somewhat less powerful is probably going to be fine too.
  • 160/200 GB disk would be nice for dual boot system, 5400 rpm is good enough on Linux as it has really awesome I/O caching unlike OSX. I'm not sure about XP.
  • I don't remember the last time I've seen a CPU-bound program, vast majority being limited by memory or I/O or GPU. So Intel Core 2 Duo 2.0 GHz or its moral equivalent by AMD should be just fine.
  • At least 3 USB ports, with 4 or more points scoring extra points.
  • DVD burner and real DVD drive (not annoying slit like in Macbook) would be a big plus.
  • I woudn't care if it was a desktop but for a laptop 3-year guarantee is pretty much necessary.